Pages

Saturday, June 30, 2012

DIY Modern Art

Last week, my friends and I got together to be artsy.  I've had this project on my list  for quite awhile, so I was pretty excited to finally do it.  This was super easy and (I think) looks awesome!

Step 1:  Gather supplies.  You just need a canvas, some painters tape, acrylic paint and paint brushes.  I used 3/4in tape, but you can get it as skinny or as wide as you want it.   


Step 2:  Tape a crazy pattern on your canvas.  Make sure to push out any bubbles if you want to have really clean lines.  I missed a few spots, but I'm just saying it adds character.   If you are really serious about it, you can also draw up a plan on your computer before you tape, to see what the end result will be.  I just kind of randomly put tape on there, and I was happy with the result. 


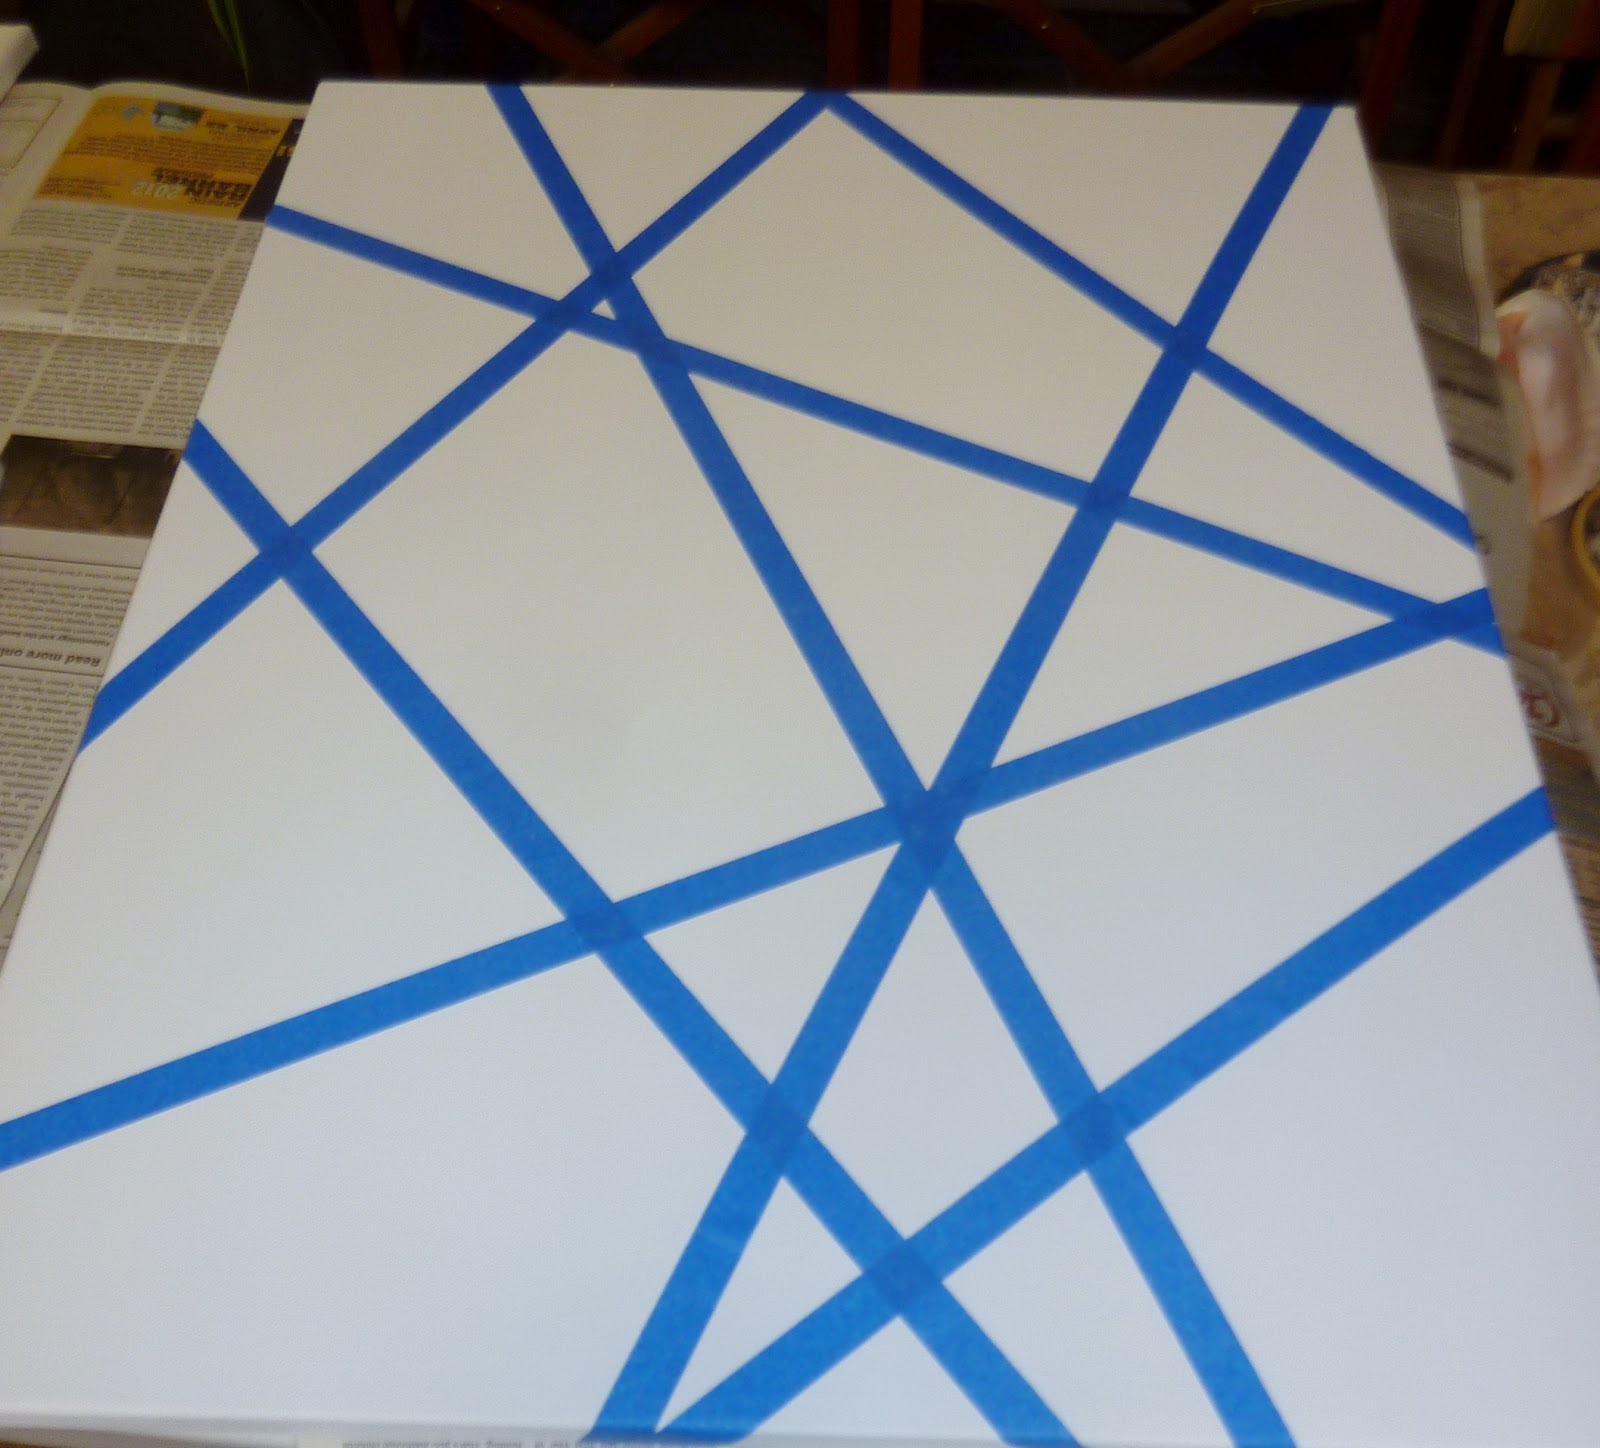
Step 3:  Paint your piece!  I used a pencil to mark which color was going in each spot, to make sure I got the look I was aiming for.   After I was done painting, I was a little nervous. 

Step 4:  When the paint is still a little wet, remove the tape.  If you let the paint dry, it might peel off with the tape.  Since the paint is still a little wet, just be careful as you remove the tape.  


Step 5:  Show off your awesome new artwork!  I am pretty excited about the end result!  


And since I call this a fashion blog, it wouldn't be complete without an outfit picture!  I turned my t-shirt inside out and made a little apron out of a trash bag to protect myself against the paint!  Pretty classy, right?

Bonus picture:  Look how cute my painting looks in the back of Brooke's car!  It was meant to be! 


Now I am excited about trying some other crazy art projects.  Have you done anything artsy recently? 

Friday, June 29, 2012

FBFF - In the Bag

The FBFF topic for today is "What's in your purse?", and as I started thinking about this, the more appropriate question is "what isn't in my purse?"  I mean, I guess I believe in being prepared.  Here's my list, in order of importance:

Essentials:  If I leave the house and don't have these items, I will need to go back:
  • Cell Phone
  • Keys
  • Sunglasses
  • Wallet 
  • Chapstick
  • Eye Drops

Things I usually have, but won't panic if I am without:
  • camera
  • Kleenex
  • hand lotion
  • at least 1 pen (or 4, as evidenced here)
  • iPod - yes, that's a first generation iPod that only plays music. 
  • Tide pen
  • Gum
  • Tylenol, Advil, or Aleve
  •  Weekly planner

So, what is in my wallet?  Well, right now:
  • Driver's license
  • Credit and debit cards
  • various rewards cards (Panera, Dillon's, Ulta, DSW, etc)
  • Gift card to Loft
  • Insurance Card
  • A few of my business cards - which I have never given to anyone.  
  • Blockbuster card (probably hasn't been used in a few years)
  • 4 frequent flier cards from various airlines - all with my maiden name, and probably expired miles
  • Some checks I need to deposit at the bank
  • 7 pennies (one of which is from Canada - not sure where I picked that up)
  • 16 quarters.  Because I had a moment of vending machine weakness and a $5 bill.
  • A $2 bill.  I have had this for at least 15 years.  I have no idea why.  I think my sister gave it to me, and I'm not going to spend it, so I just keep it in my wallet.  

Pretty exciting, huh?   What's in YOUR purse?  Link up with Katy over at Modly Chic if you want to share! 

Thursday, June 28, 2012

Humidity, Pedicures, and Presents!


Today was officially the most humid day ever.  That may not be true, but it was the type of day where you walk outside and your sunglasses fog up so bad you can't even see.  But it's so sunny that you can't take your sunglasses off.  On days like this, I should really just stay inside, but I had to go to work.  One of my co-workers suggested that we should get pedicures after work, and that seemed like a really good idea, so I now have sparkly blue toes!

After my pedicure, I ran into Target really quick, just to pick up a few grocery items.  Two pairs of shoes later, I finally made it to the grocery side of the store.  Target is trouble.  

When I got home, I was excited to find this on my front porch:

Remember the blog swaps I mentioned last week?  Well, I got my Soak Up the Sun presents from Libby.  She went all out, and I am so excited that I signed up for this swap.  It is just so fun to get a bunch of little presents in the mail! 

Look at all this!!!

In conclusion, you should all sign up for the next blog swap you see, because it is super fun.  Special thanks to Meg for hosting!

Outfit details:
Top: Gap
Skirt: Loft
Shoes: Target
Necklace: gift (from China)

Lemon Yellow


Do you ever have white shirts that get dingy and unwearable (perhaps even pit-stained)?  I'm not saying I do, just hypothetically... 

Anyway, I wanted to salvage these things, and RIT dye was my best idea.  I've used RIT before in the washing machine, but got kind of uneven results.  I decided to try the kitchen sink this time around.

Step 1:  Gather whatever clothes you want to dye.
Before

Step 2:  Get your supplies ready.  All you need is dye and salt!


Step 3:  Fill the sink with hot water, add salt.


Step 4:  Add the dye to the water, get the clothes wet, and then add the clothes to the water, too.  Stir them around to make sure they are thoroughly saturated.


Step 5:  The directions said to "Stir constantly for 30-60 minutes", but I had better things to do than standing at the sink for an hour, so I just let them soak and stirred every 10-15 minutes.  


Step 6:  When the time is up, rinse the clothes until the water runs clear (or mostly clear if you are impatient!).  Then wash and dry them like normal.

Step 7:  Revel in your awesome new clothing pieces!  I'm especially excited about my new yellow cardigan!  

I call this a pretty successful dye job!  I have another white cardigan that needs some help.  I'm just trying to decide what color to go with.  What do you think I should do?

Have any of you tried dyeing clothes before?  How did it turn out?

PS-I should add, bleach out your sink before your husband gets home and notices you turned it yellow!  

PPS - I already wore my new cardigan - here

Wednesday, June 27, 2012

My Sister's Wedding


I'm a little late on this post, but it's my sister's fault for getting married on the exact same day as my parents.  So, these pictures are from June 3, 2000.  

We originally ordered our bridesmaids' dresses from David's Bridal.  Then we found out they were back-ordered, so we had to find a new plan.  We ended up getting a similar dress from the Chadwick's catalog.

Here's a random and funny story about the dress.  When John and I were first married, his parents were over at our apartment, and I had the above picture on a bookshelf in our living room.  His mom asked me about the dress, and we realized that she wore the exact same dress the exact same summer for her sister's wedding.  How weird is that?!


And here's a picture of all 4 siblings.  Can you tell we are related?  We kind of look alike!


Tuesday, June 26, 2012

Summer Date Night


Over the weekend, John and I went on a little date to dinner and a movie.  I felt like looking cute, but didn't want to be too dressy.  Also, it was about a million degrees outside (maybe more like 100), but I knew it would be chilly in the movie theater, so I compromised on shorts and a sweater.

We took the pictures after dinner, but before the movie.  It's so awkward to take outfit pictures in public!  There weren't very many people around, and we kind of ducked behind this brick pillar at the outdoor mall, just to be sneaky.  Can you tell I'm a little nervous?  There were some people getting a little to close there at the end!

Top: Alfani
Short: H&M
Cardigan: Old Navy (dyed by me)
Shoes: Carlos Santana by DSW

DIY Pillowcase Dresses


This is my favorite project from when my nieces were visiting, and quite possibly my favorite project ever.  I've had my eye on some pillowcase dress tutorials, but with this project, I was really not that interested in following directions.  Sometimes, I would just rather wing it!

So, we went to Walmart to find some pillowcases and ribbons.  First, we had picked out some really basic gray pillowcases, thinking any ribbon would go well with it.  Then we saw an end-cap display with fun pillowcases, including these polka dotted ones.  SOLD!

Then we went to the ribbon aisle and let the girls pick out whatever ribbon they wanted (within reason).  I think both of their choices were super cute!

So, then we got started!  My sister helped out quite a bit on this project.  We worked after the girls were asleep, and had some pretty awesome sister time while we were working. 

Step 1:  Seam-rip the closed end of the pillow-cases.  NOTE:  depending on the type of fabric you are using, you might need to stitch a little hem after you rip the seam.  This fabric was fraying quite a bit, so I did a quick zigzag stitch to keep it in check.

Step 2:  Cut the armholes.  This is not an exact science.  We used another dress as a guideline.  Then I just made about a 1/4 inch fold and sewed around that, to make a finished edge.  You could also use bias tape.  

Step 3 (optional):  Sew the ribbon around the bottom of the pillowcase.  I just think this adds some extra cuteness and interest to the dress.  In these pictures, we were just making sure the dresses were long enough.  For taller kids, you could probably sew a band of extra fabric around the bottom to get the right length. 
Delia
Matti

Step 4:  Measure how wide your ribbon is, and fold the top section down so the ribbon will fit through without bunching.  Then sew that on both front and back.

Step 5:  This was the one part the girls got to help with!  Sliding the ribbon into the slots on the front and back.  I have a bodkin, which makes this super easy.  They did a great job!

Matti and me, and my mess of supplies
Delia, with iCarly in the background


Step 6:  Once the ribbon was threaded through, we had to check the fit.  We decided to just have a bow on one shoulder, but I've seen them with bows on both side.  I mostly just made sure the straps would fit right, and that the arm holes weren't too big. 
fitting Matti

Then I sewed the ribbons into place, and took in the sides a little bit, to make it more A-line, and we were good to go!

Now I want to try making a dress like this for me.  Obviously, I won't be able to start with a pillowcase, but it wouldn't be too hard to start from scratch, right?  I'm thinking something like this.

What other easy sewing projects should I try out??

I'm linking up with The Pretty Pinhead today.  Go check out the other bloggers!

Monday, June 25, 2012

Chicken of the Sea


This is a new outfit, except for the shoes.  Like I said before, my sister is either good luck or a bad influence when I am shopping, because I found this top and these jeans when she was here.

The top is from the Dillard's clearance center in Council Bluffs, IA.  We ventured over there and had an awesome time.  We also found some great deals!  If there is a Dillard's clearance center near you, go there!  Make sure to carve out several hours, because it is a warehouse full of things, and there were only about 3 dressing rooms total. If you enjoy hunting for great deals, you will love it!

These jeans are from Von Maur, and they are Jessica Simpson brand.  This is my first Jessica Simpson purchase.  I generally dismiss celebrity clothing lines, because I just think they are grasping at whatever fame and money they can get.  But my sister grabbed these jeans off the clearance rack, and I kind of love them.  They are called "Forever skinny", but I think they fit more like boyfriend jeans.  I thought I'd use a Jessica Simpson song as my title, but I couldn't think of a single one.  I went to Wikipedia to jog my memory, and skimmed through the list of singles, and I don't recognize any of them, so I'm giving up and going with the first thing I remembered about her - Chicken of the Sea!

Top: Sunset Rd.
Jeans: Jessica Simpson
Shoes: Seychelles

Sunday, June 24, 2012

Transformers


I have a confession to make:  this skirt isn't really a skirt.  It's a dress.  I just have the top folded over to make it a skirt.  In fact, I liked it so much as a skirt that I decided to take the plunge and officially chop it into a skirt.   So, without any further ado, here's my step-by-step instructions: 

Before - the dress

Step 1:  measure and chop.  Since this dress was more of a midi than a maxi on my giant self, I didn't have to chop very much off the top of the dress.  I also made sure to allow for folding over the waistband.


Step 2:  Turn inside out to fold over the waistband.  I just made sure it would be wide enough for the elastic to fit.  Then I pinned it. 


Step 3:  Sew around the waistband.  Leave a couple inches open to feed the elastic through. 

Step 4:  Feed the elastic through the waistband.  Then sew the ends together and sew up the opening in the waistband.

Step 5:  DONE!  Hang your new skirt up in the closet, and start pinning inspiration for how you will wear it!


Skirt (dress): Gap Outlet
Top: Preston&York via Dillard's
Cardigan: Old Navy
Shoes: Carlos Santana via DSW